
You’ve designed a shiny new website, carefully selecting the colors, typography and photographs to perfectly reflect the company's brand. Now it's time to add a map! You could use a map-building wizard, such as the one that comes with every Google account, but their functionality is limited and they look pretty generic. The Google maps API, on the other hand, gives you the freedom to create completely customized maps, which can do all sorts of cool things!
An API, or Application Programming Interface, is a fancy way of saying a set of commands (functions) a company (Google) publishes. The idea is that you can use these commands to create a highly customized version of their content. In the case of the Google Maps API, for example, the "content" is their maps, which allows you to customize things such as colors, map markers, pop-up box style, level of detail and zoom level.
In this tutorial, we're going to create a custom Google map for The Fideler Farm, a popular local strawberry and produce farm. We'll show you how to easily add a custom-styled map with a custom marker and an info window that opens when the user clicks on the marker. All you need is a little bit of time and basic HTML, CSS and Javascript knowledge.
Let's dive in!
Google Account
To get started you need a Google account. If you don't currently have one, head over to Google and sign up.
Documentation
While we'll be walking you through this tutorial step-by-step, for future reference you'll want to bookmark the Google Maps Javascript API page. The main areas are:
Developer's Guide — Code snippets that show you how to use the API functions to do certain things.
API Reference — The full reference list of all the functions in the API. Use this as a kind of "shopping list" of what you can do using the API.
Google Maps API Key
The next step is to obtain a Google API Key, a long sequence of letters and numbers, unique to you. Go to this page, and click the Get a Key button. The whole process of getting the API key will take just a minute or two.
Note: You will be required to set up a billing account to be used in the event your usage exceeds a certain limit. However, there are controls that can be set so you do not exceed this limit.
If you are going through this tutorial for educational purposes, you can skip this step. The API key included in the source code should work locally without a problem.
All set? Let's move ahead to the HTML.
The HTML template is quite basic:
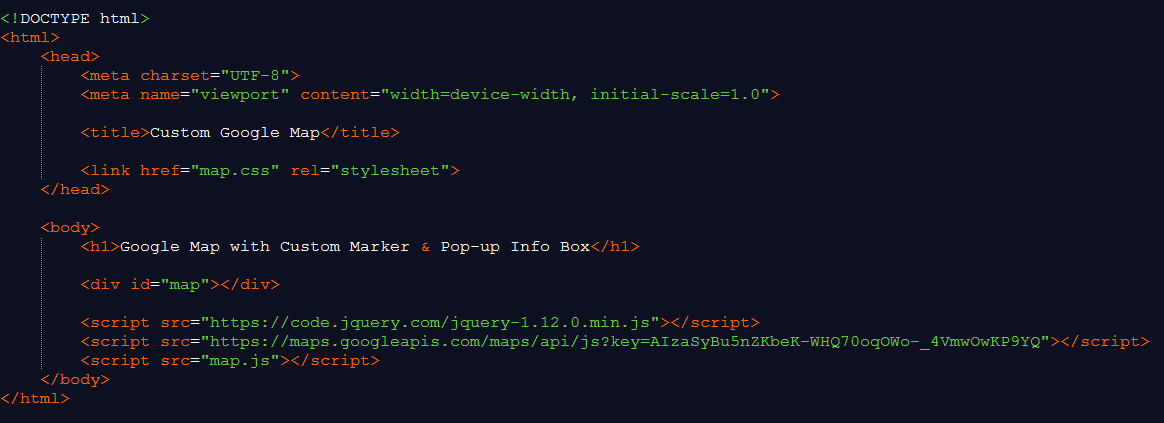
The HTML Explained
In the head, we include the local map.css stylesheet. We will do our basic styling for this demo in this file.
Important is the presence of the empty div id="map". This is the container for our Google map. Place it where you want your map to appear on the page.
Before the closing body tag, we include jQuery, the Google Maps script, and the local map.js file. We will initiate the Google maps in the map.js file.
If you have your own Google Maps API key from the previous step, replace it in the source code here: key=YOUR_KEY.
That's all for the HTML. Let's move on to the Javascript.
The basic initialization of our Google map is shown in the Javascript code below:

The Javascript Explained
When the page is loaded, the initMap() function is called. This is done by the Google Maps addDomListener() function.
Within this function, we declare the location we want to center (The Fideler Farm) on our map. The first number is the latitude, the second number is the longitude.
Then we get the mapCanvas element. This is our div id="map" from the HTML code above.
We define some basic map options (zoom level, map type).
We create a new Google maps object and pass our configuration to it in
new google.maps.Map(mapCanvas, mapOptions);.
Our Google map is now rendered to our page with The Fideler Farm centered on the map:
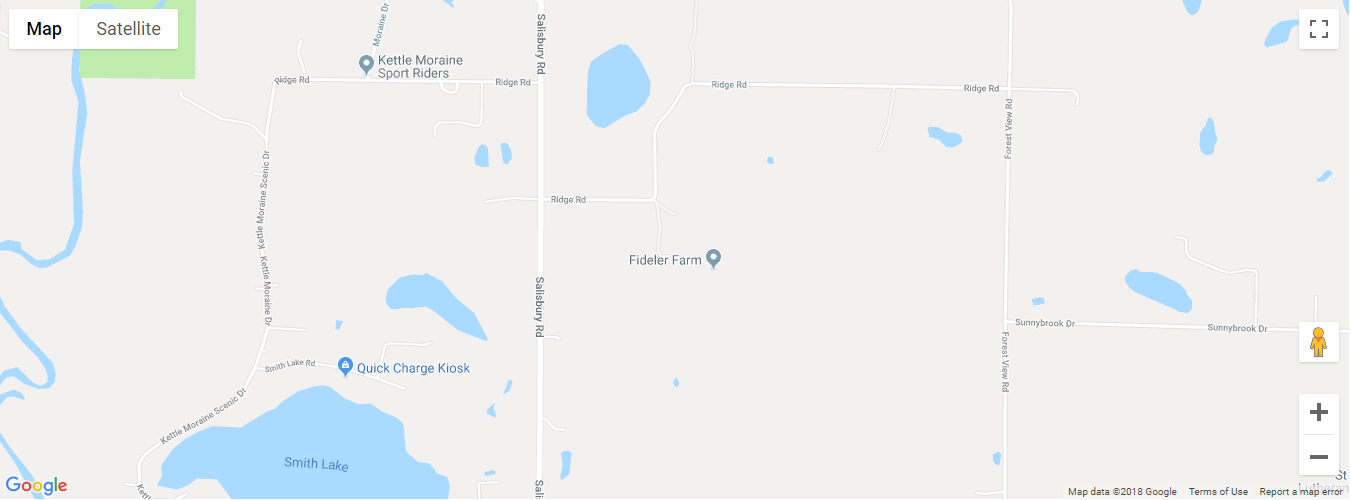
While a Google map drawn by this code is perfectly usable, it still looks pretty basic. Let's add a few things!
Now that we have the map rendered, we'll add a marker with a pop-up info window. Here is the code:
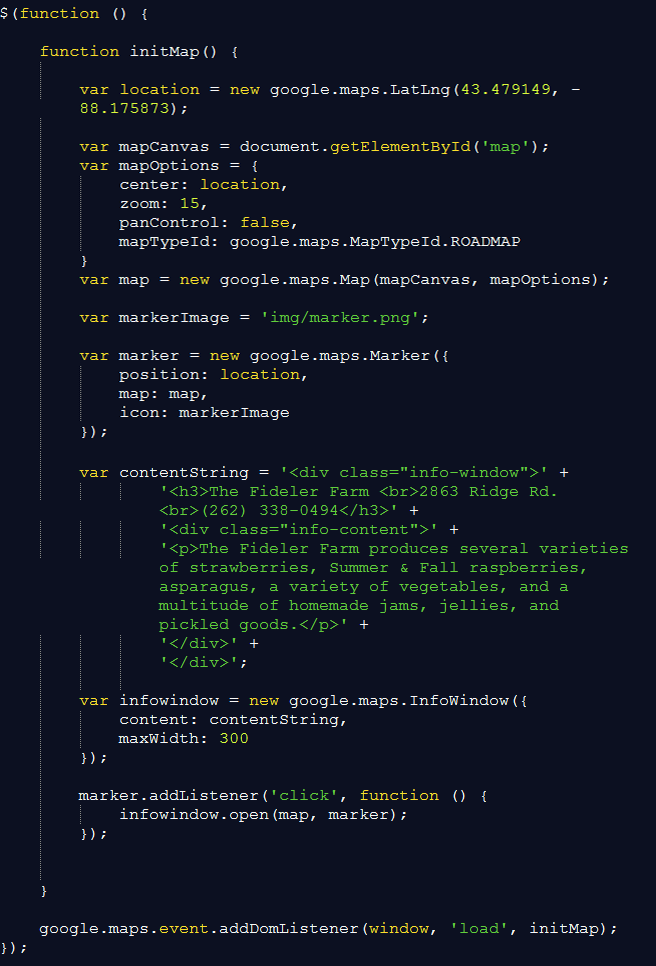
The Code Explained
First we define the file path to the marker icon in the markerImage variable.
Then it is added to the map by calling new google.maps.Marker. We will pass to it a location, a map object, and the path to the icon.
Then we define in the contentString variable the content of the info window to be shown after the user clicks on the marker.
Next we create the info window object by calling new google.maps.InfoWindow.
Then we create a new Google maps object and pass our configuration to it in
new google.maps.Map(mapCanvas, mapOptions);.
Our last steps here are to link the info window to the marker and add a function that will wait to show it only after the user clicks on the marker: marker.addListener.
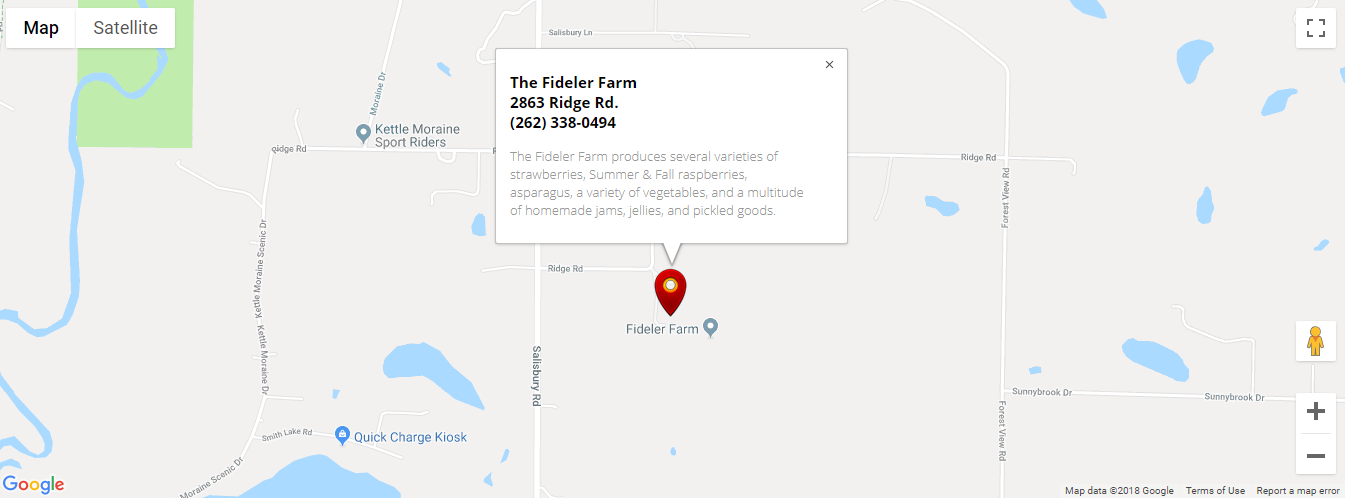
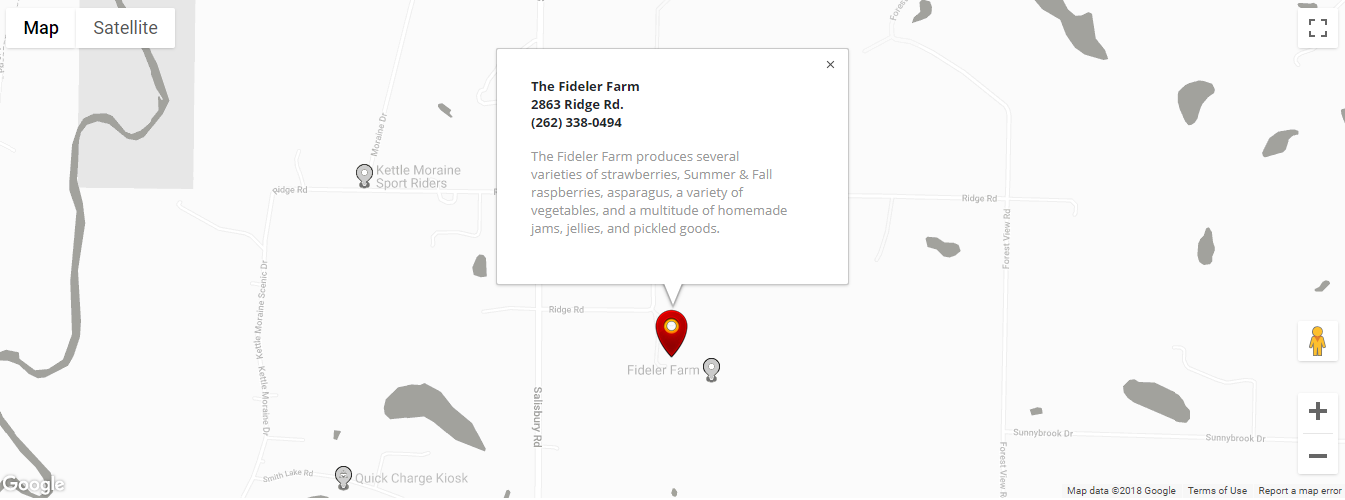
Take a look at the result of these steps on the image below. Everything seems to be working!
Our final step is to add a little styling to our Google map.
We will add the following snippet of code from Snazzy Maps to the initMap function to give the map a subtle grayscale look:

And here is our final map with grayscale styling!
Hopefully you now have something working that resembles this demo map. If something has gone amiss, take a look at the source code and attempt to troubleshoot your code. A link to download the files is below.
We've touched on only a few basic techniques you can integrate into your maps using the Google Maps Javascript API. More advanced techniques include displaying live data, grouping markers, planning routes, drawing custom overlays, dynamically revealing data — the list is endless!
We hope you have enjoyed this tutorial and have learned a few interesting things in the process! Until next time, happy coding!

Projects
